
Upcycled Marquetry Table Lamp
This project was equally challenging and rewarding
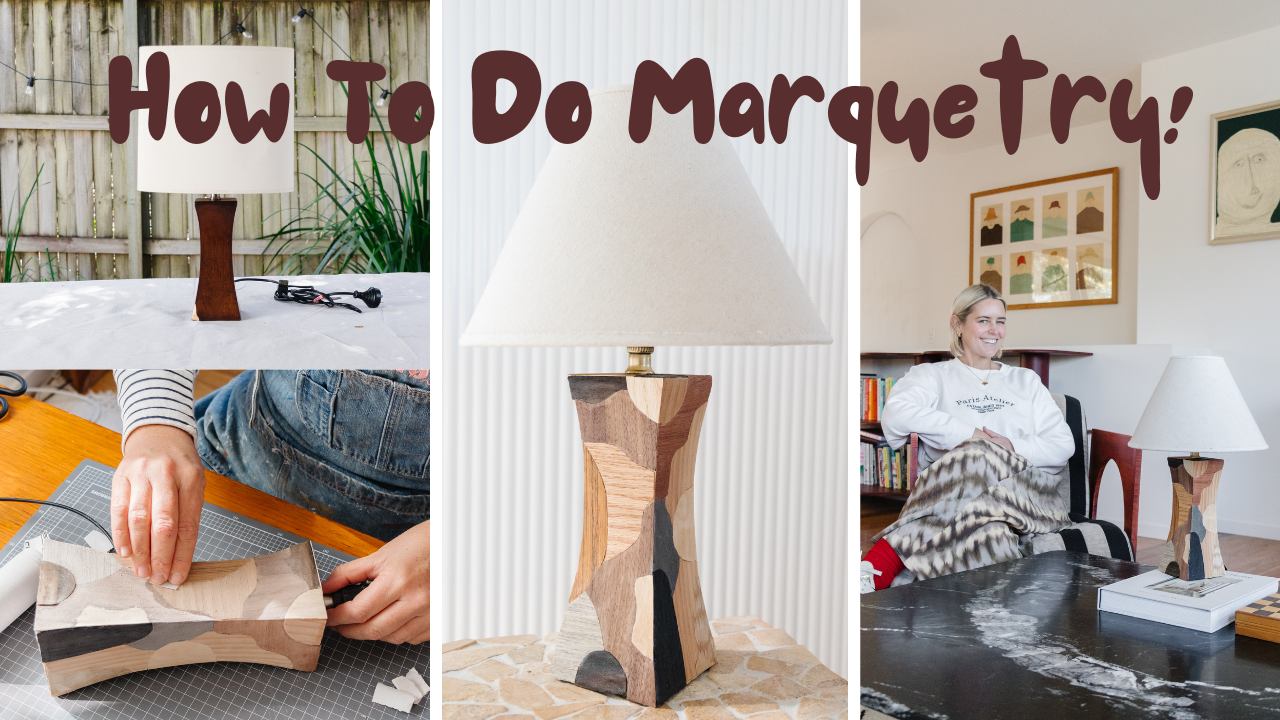
After falling in love with marquetry and wanting to try this technique, inspired by marquetry artist Chelsea Vivash, I set off to find a secondhand wooden lamp. I learned a lot during this project and have also shared a detailed tutorial on my YouTube Channel with all my tips and tricks, as well as links to all the materials I used. And of course, thank you to everyone who voted on which piece of secondhand home decor I should use for this technique. I had such a fun time and you were so right, a table lamp was a great canvas for my creativity!
To see how my Upcycled Marquetry Table Lamp came together, watch this Instagram Reel
Before & After


Watch the full tutorial on YouTube

Project Details
♻️ Upcycling: A secondhand table lamp
🕒 Project Time Estimate: 6 hours minutes (not including any drying time)
🪑 Skill Level: Intermediate
💰 Materials Cost: $50
👷🏼♀️ Safety Gear: Protective ear plugs, eye goggles, face mask
Tools
Drop sheet
Detail sander
80 grit sandpaper sheet
Cutting mat
Craft knife
Metal ruler
Paint brush
Thin MDF
Clamps
120 grit sandpaper sheet
240 grit sandpaper sheet
Microfibre cloth
Materials
Wood filler
Pen & paper
Wood veneer
Wood glue
Low tack tape
Gloss wood varnish
Plastic bag
Gold spray paint
VIP Note: The lamp base must be made from wood in order for the wood glue and wood veneer to adhere properly.
Inspo
I was inspired by Chelsea Vivash’s exquisite marquetry designs and wanted to try this technique on a seconhand lamp.


How To
Step 1: Place a drop sheet onto your work surface. Remove the lampshade from the base. Using a detail sander, remove the varnish from the wooden lamp base. My lamp base had a chip at the bottom, so I used wood filler and a palette knife to fill it in.


Step 2: While the wood filler was drying, I started working on my wood veneer marquetry design. I traced around the lamp base onto paper, which wasn’t easy because the surface is curved and not flat. After a few attempts, I finally settled on a design. I placed a piece of wood veneer underneath the piece of paper, which I taped to keep the paper or veneer from moving, and drew over my design several times to indent the wood veneer underneath.
Step 3: Then I started the process of cutting out 3 pieces from the main piece of wood veneer using a craft knife. Take your time. Wood veneer is very delicate, and it may break, which means you might have to cut that piece again. I filled in the remaining sections with different wood veneers and made sure the wood grains were going in opposing directions to add an element of interest. I used low tack tape throughout this entire step. I also found it helpful to place some underneath some of the fine pieces of wood veneer to keep it from breaking. Keep going until you have cut all the pieces required.


Step 4: Using a paint brush, I applied a generous amount of wood glue onto one side of the lamp. Starting from the top, I placed the cut wood veneer on top of the glue and used tape to hold them in place and prevent them from slipping around. The joins between the veneer pieces are not perfect, but I was hopeful I could improve this when I had to sand the wood veneer. I placed a piece of MDF on top of the base, clamped it down and let the wood glue dry overnight. I repeated Steps 2, 3 and 4 for the remaining sides and the top of the lamp. Applying the wood veneer/marquetry design took an hour of work across 4 days in total. Each time the wood glue had dried on one side, I would remove the low tack tape and it was SO exciting seeing the marquerty emerge!
Extra Tips: I made sure my marquetry designs flowed from one side to another at least once or twice, but I also made sure each design was different from the others. And I used contrasting wood veneer colours and tones that worked well together.


Step 5: Using a 120 grit sandpaper sheet, I carefully gave each side and the top of the base a light, consistent sand working along the grain of each piece where possible. I didn’t want the black wood veneer dust to run into the other veneers, so I was very careful to work on that separately. Then I repeated this again using a 240 grit sandpaper sheet. Thankfully no veneer came off, but if it did I would have done a simple repair.
Step 6: Following this I applied two coats of wood varnish all over the marquetry using a clean microfibre cloth, and waited for the first coat to dry before applying the second coat. I covered the base with a plastic bag and tape, then sprayed the base of the socket with gold spray paint. When this had dried, I placed a globe into the lamp and installed a different lampshade back on. And that’s it. Phew!


Ta daaa!
This was such a fun technique to try! My project isn’t perfect, however it brought me so much joy trying marquetry on a secondhand table lamp. I am so proud of what I accomplished - especially as I have never worked with wooden veneer or even attempted the skill of marquetry before. I truly admire Chelsea Vivash and her incredible marquetry skills, so if you don‘t feel like trying this yourself, I highly recommend supporting her and purchasing one of her marquetry pieces.


