
How To Build A Dollhouse Part 3: The Reveal!
It’s time for a room by room dollhouse tour!
As you know I’ve been busy building a dollhouse from scratch to celebrate Sheet Society’s new Autumn Collection - the frame, the roof, the chimney, the walls, the wallpaper, the floors, the ceilings and the teeny tiny furniture! I was so inspired by the colour palette and fabric offcuts Sheet Society gave me that I also took a gamble and made the cutest miniature scaled wallpaper using their collection patterns! This dream project has been a riot of creativity, fun, imagination and colour. I love a challenge, especially one that’s as resourceful as this, so I’m thrilled to take you on a tour, which you can watch here. Thank you for joining me here over the last few days. As always, I’d love to hear what you think! And let me know, which room is your favourite?
To see how it all came together, watch these videos below!
📹 Part 1: Making the Dollhouse
📹 Part 2: Making the Miniature Furniture
📹 Part 3: The Reveal & Tour!
Want the exact plans, measurements, tools and materials I used to make my dollhouse from scratch? Here you go!
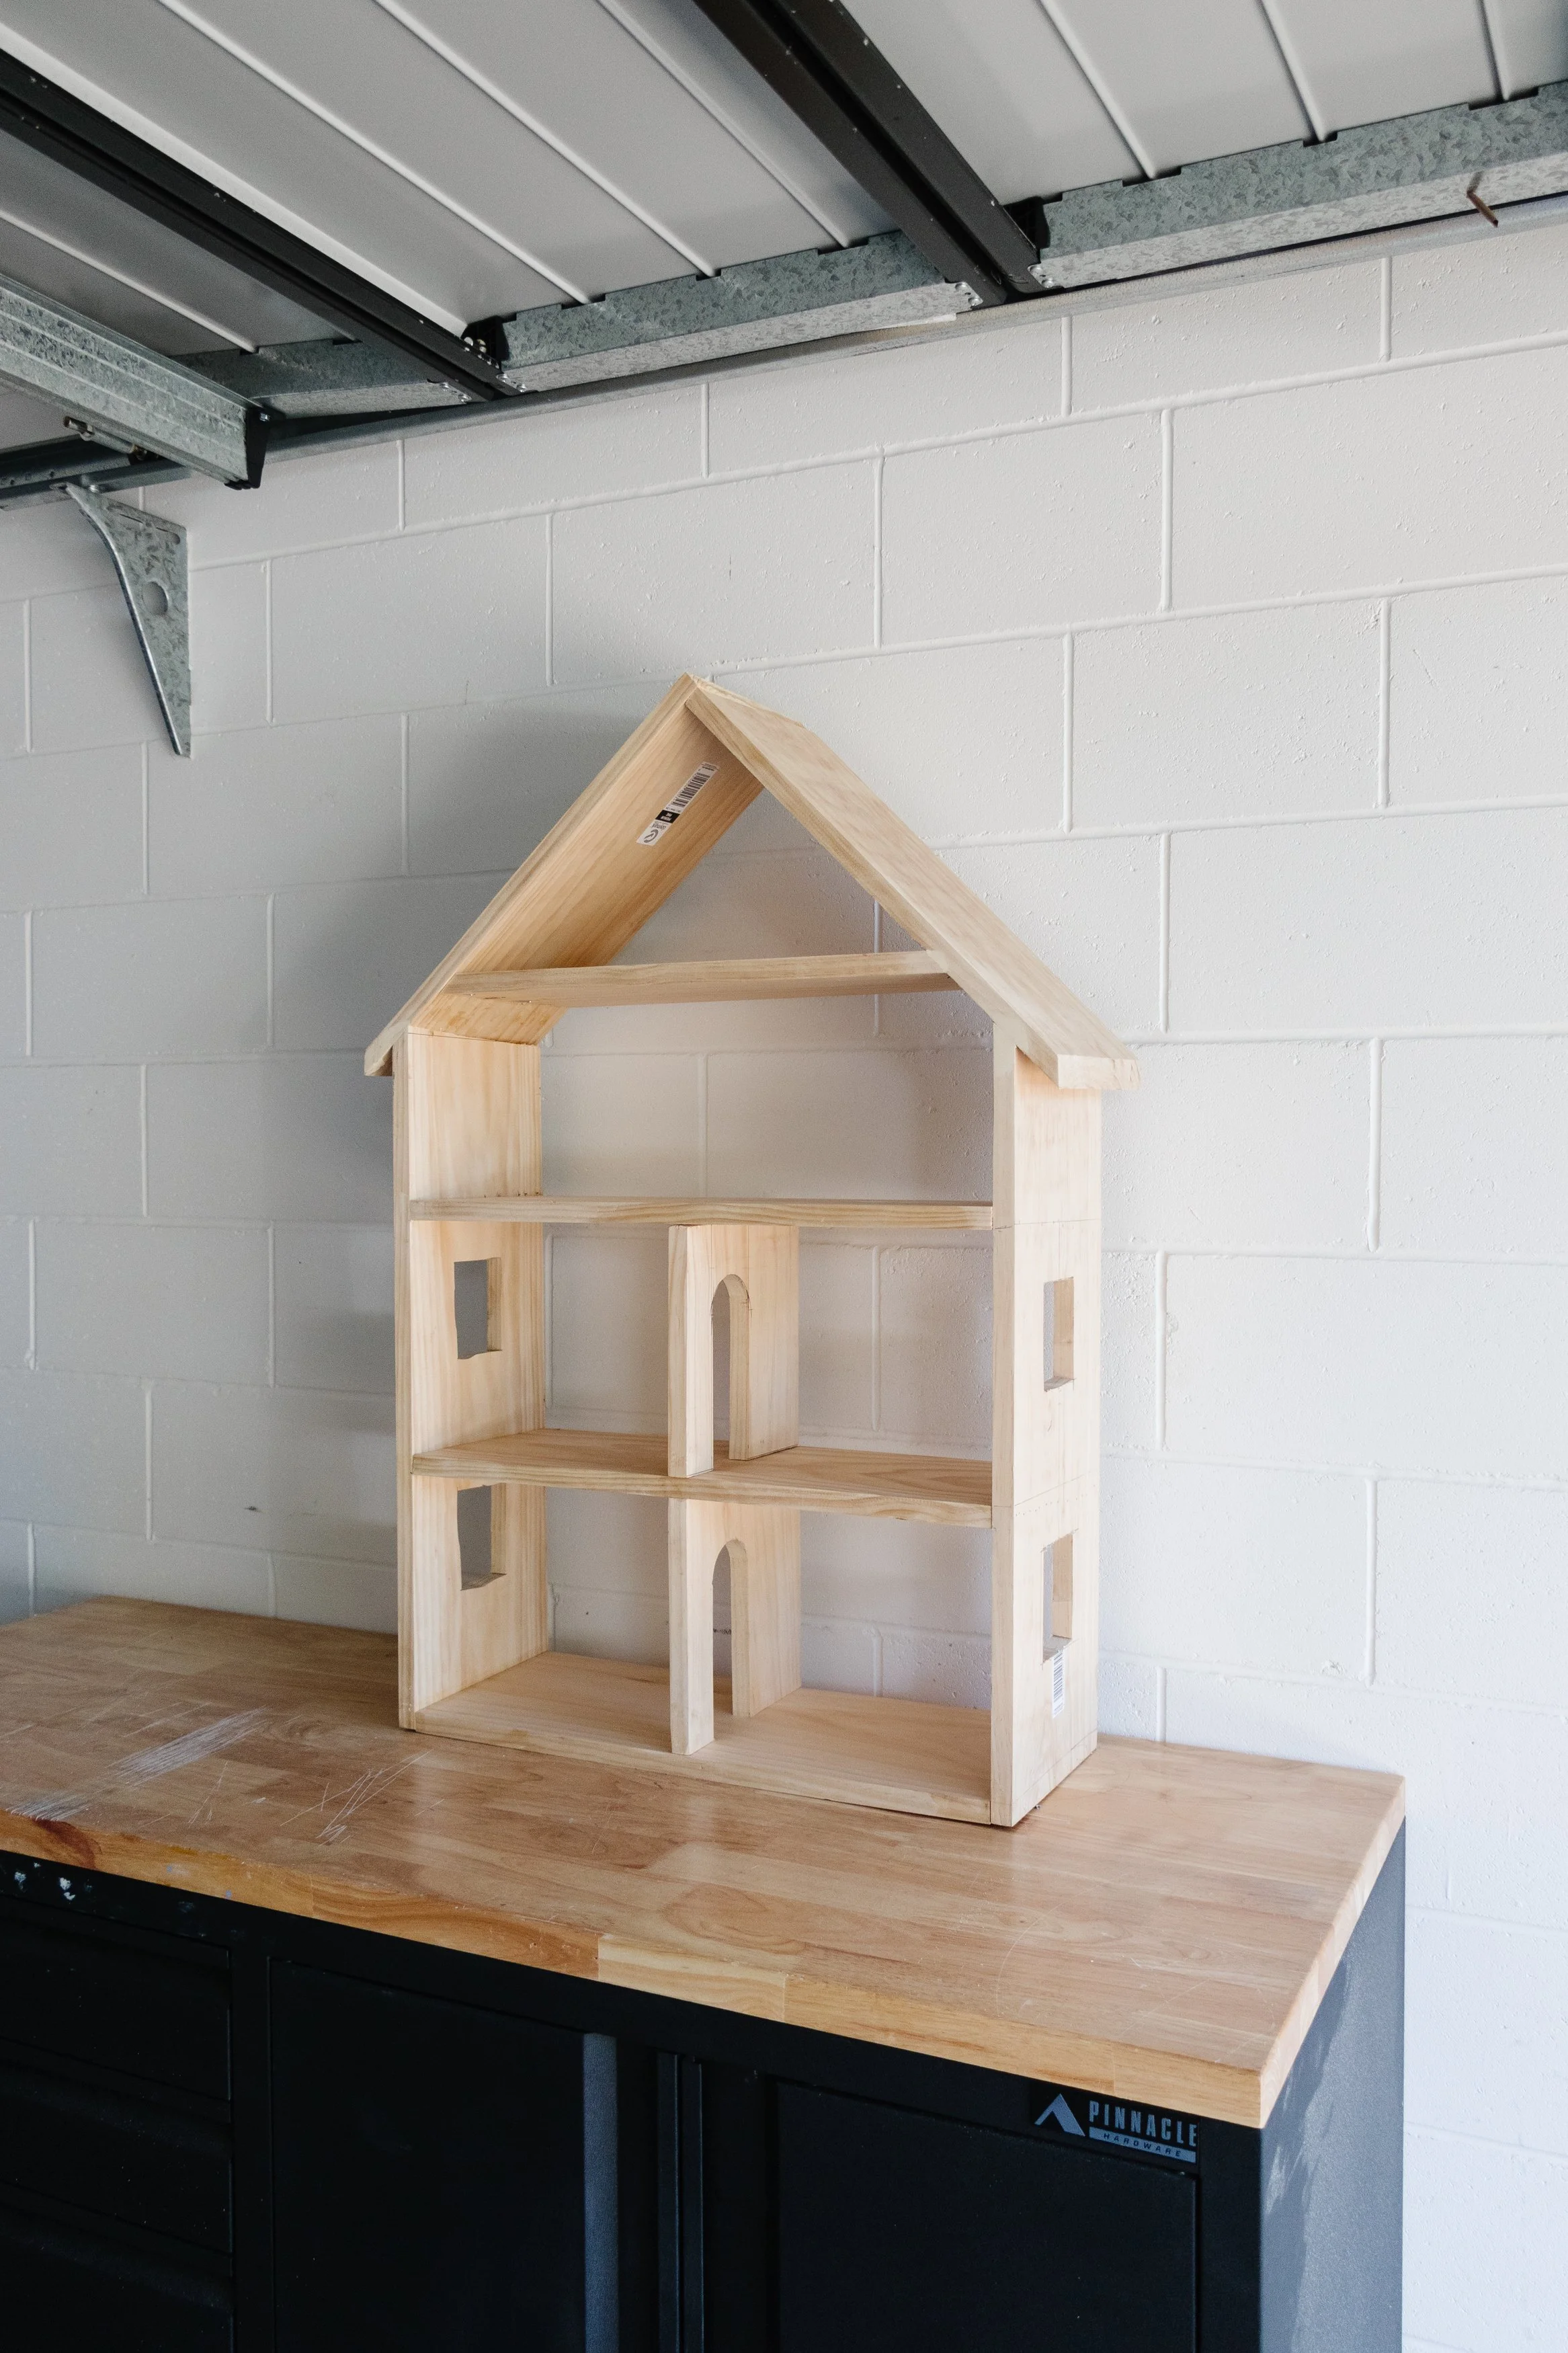
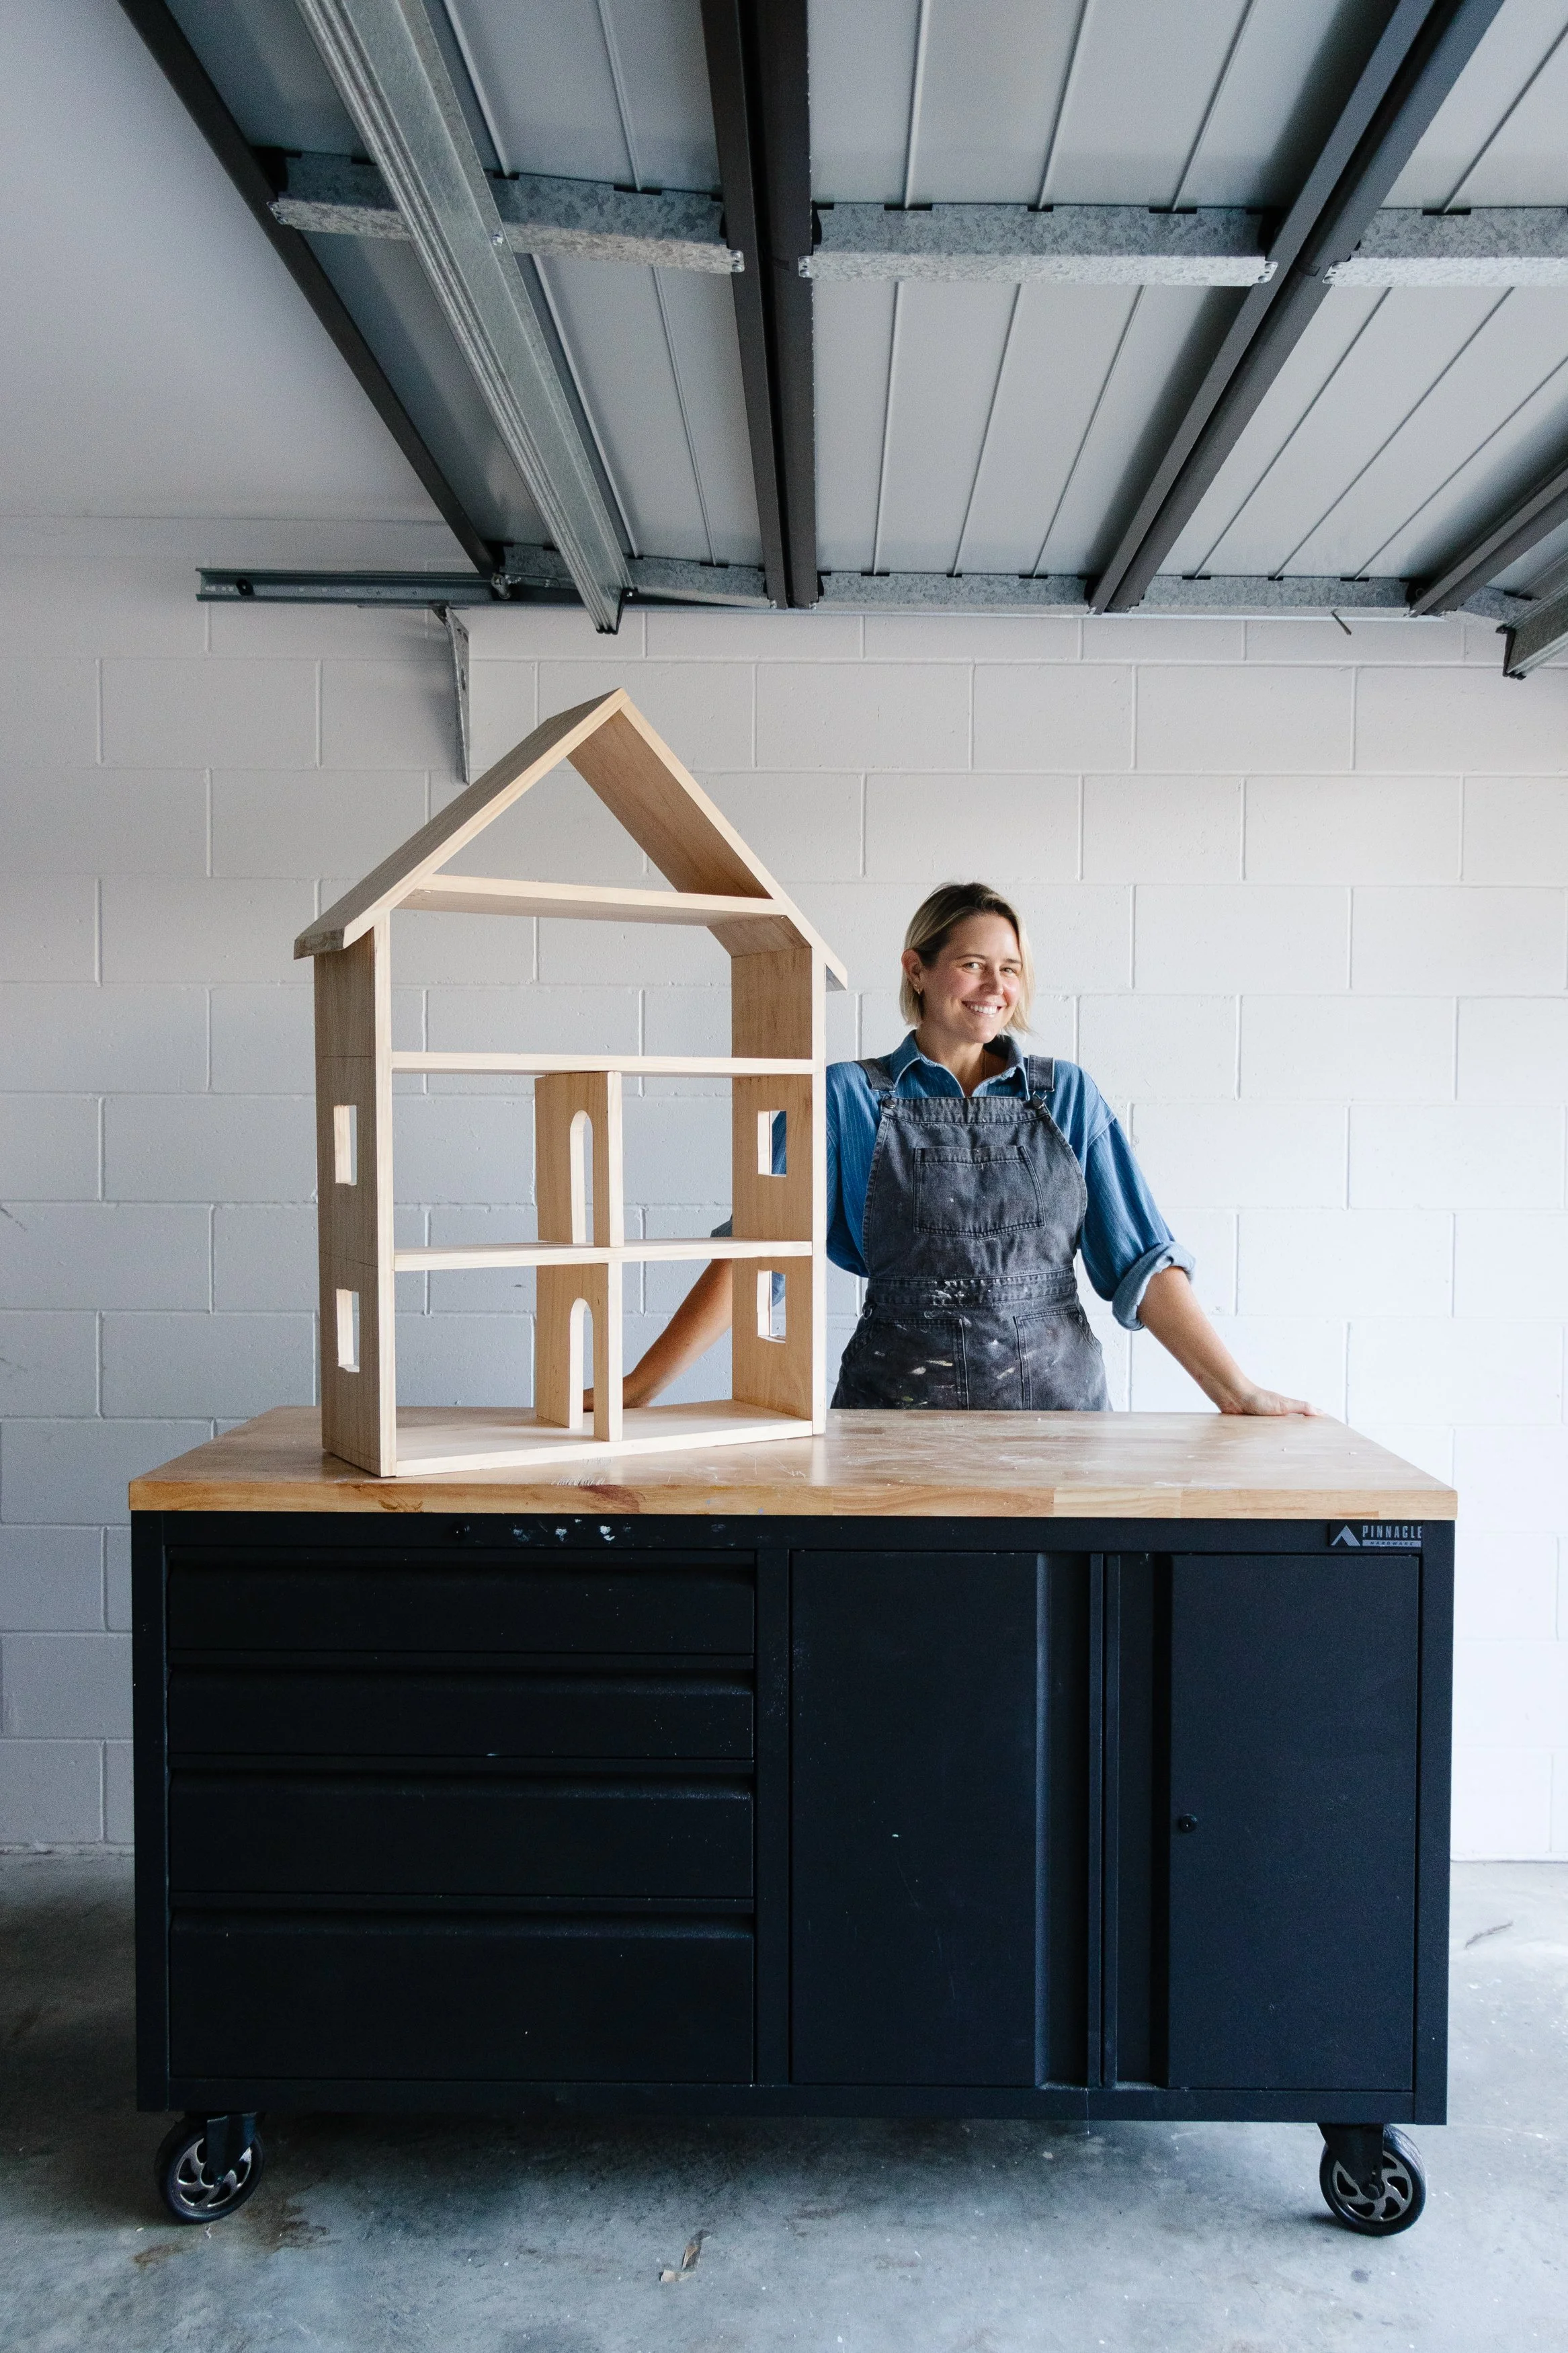
Renovating a dollhouse is so exciting! It’s such an amazing experience of learning and doing. But building a dollhouse from scratch is a whole different kind of satisfying. There’s something very special about it!
My “Build Your Own Dollhouse Plans” with materials and step-by-step instructions will give you the guidance to build a beautiful multi-level dollhouse frame from the ground up. Because once you realise you can build it yourself, there’s no going back.


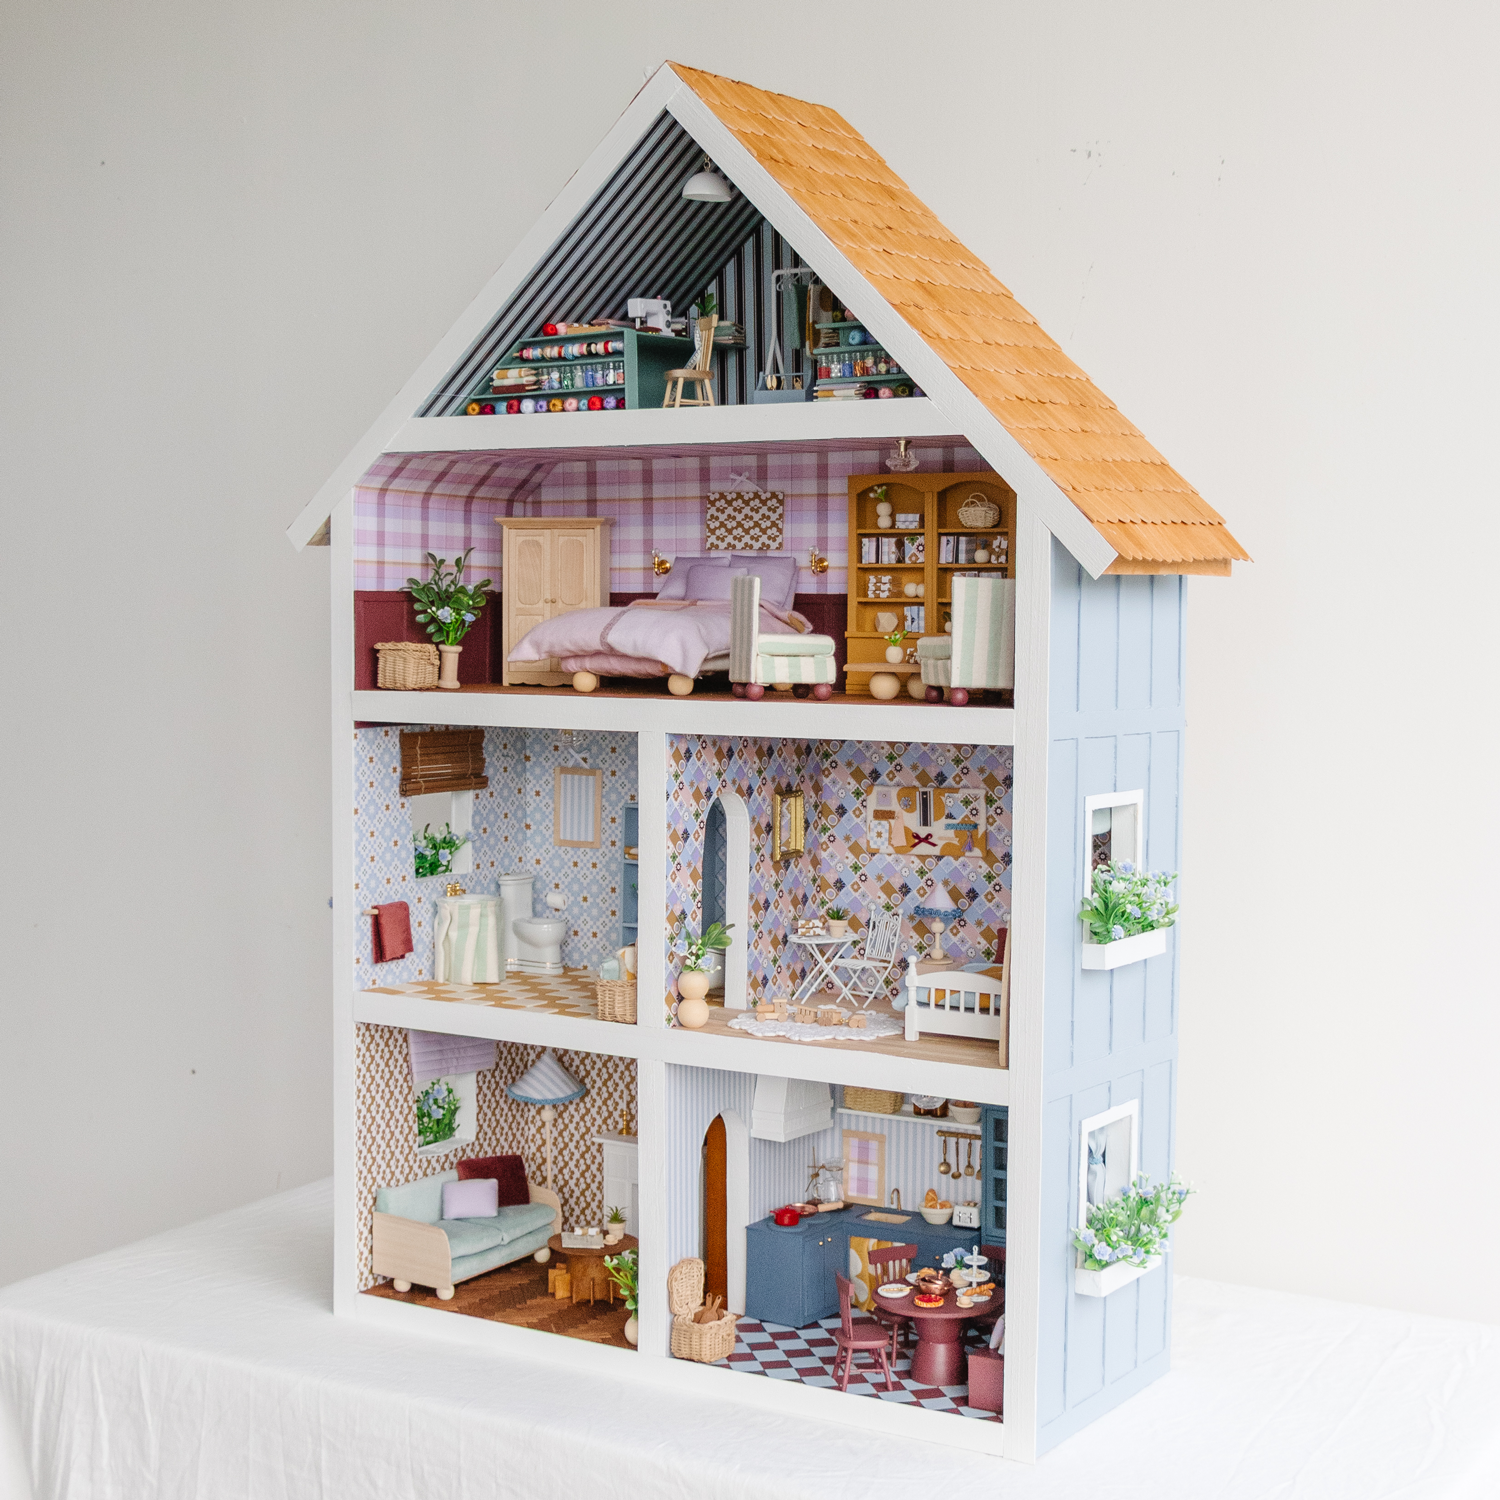
The Exterior
I wanted to try something new for the exterior, so I went for a modern farmhouse look for the walls. I used regular and jumbo popsicle sticks with hot glue to achieve this. I became a little obsessed and used wood putty to fill in between the joins, which I smoothed with sandpaper once it dried to give the cladding a continuous look. I also built the cutest little window boxes using jumbo paddle pop sticks! I decided to paint the exterior walls a gorgeous dusty blue to match Sheet Society’s autumn colour palette, and for contrast, I painted the window and plant boxes white and filled them with fake greenery and tiny blue flowers.
I made a chimney using a spare piece of timber I found around my studio, which I glued to the roof using wood glue. I added shingles (jumbo popsicle sticks, which I cut at both ends) to the roof using hot glue. I worked in rows; when one row was complete, I applied a tiny amount of timber stain to the popsicle sticks using a microfibre cloth. Then I would repeat this step until all the shingles were on. The finish and texture were stunning! Then I made a stone-effect chimney using egg cartons, which is as simple as ripping up an egg carton into small, roundish pieces and gluing it onto the chimney. Then I painted the chimney white to match the window frames.


The Wallpaper
Before we dive into a room-by-room dollhouse tour, I think it’s prudent to talk about the wallpaper! Choosing wallpaper for a dollhouse is serious business. It sets the tone for what’s to com, and it honestly can make or break your dollhouse. When I renovated my dollhouse last year, I struggled massively to find something I liked. I ended up buying pretty much what everyone else does in Australia, large scrapbook paper pads from Spotlight, but only ended up using a few sheets in each of them, which ended up being quite costly (you’ll probably find me using the remnants in my Scrapbook Series this year lol!). Anyway, I did not want to have to go through that rigmarole again, so I decided to see if I could come up with a solution.
And then I got a very random idea and decided to take a gamble. And guess what? It paid off! I asked Sheet Society to send me their autumn collection PDF files and went to my local printer to see if I could make miniature-scaled wallpaper. After debating the stock and sheen with myself out loud, and doing some print tests, I was able to make it happen! I could not believe it. I had made my very own miniature-scaled wallpaper, and it looked and felt so beautiful! I raced home, measured and cut the back of the dollhouse (using a thin panel of MDF) and applied the wallpaper to the back using PVA glue, and then to the walls. I also used a microfibre cloth to smooth the paper and get rid of any air bubbles. On that, don’t worry if you get some air bubbles. When dry, you can’t notice them. I hated applying the wallpaper last year; it was awful! So, this time round, I wanted to make the process as easy and simple as possible by applying it to the back first, then the walls, and then securing the back to the frame using my brad nail gun. It was a complete success! I was thrilled, to say the least.


The Kitchen
Ok, let’s start the tour in the kitchen! To begin with, we’ve got Sheet Society patterned wallpaper I made at my local printer, with contrasting harlequin checker floors - the colours were inspired by Sheet Society’s autumn colour palette. I made this flooring using thin sheets of hobby wood, which I individually cut and painted by hand. I made the kitchen bench with a stove, sink, curtain and drawers. I used stick on gold beads for the drawer knobs, but I applied Rub’n’Buff to them to match the hardware from the kitchen cabinet I bought. I also colour matched this cabinet with the bench I made and painted it in the same colour. I made the rangehood and floating shelf, sculptural dining table using deodorant lids and a coaster, bench seat using an Ilia make-up box from Mecca, curtains, wall art, cushions and flowers in a little wooden vase. I also used a mini door handle as a ceiling light!
And how could we forget all the teeny tiny things that make a dollhouse truly spectacular - all the kitchen accessories! We’ve got miniature bread, pots and pans, tea cups, utensils, glass jars, baskets, chopping boards, bowls, a toaster, a coffee maker, biscuits and pie, flowers, plates, cutlery and a teapot.


The Living Room
In the Living Room, we’ve got Sheet Society patterned wallpaper I made at my local printer and a cute bookshelf I filled with teeny tiny books (I used my Sheet Society miniature wallpaper to cover these little pieces of wood!). I made timber-stained popsicle stick herringbone floors, a cute ball foot velvet sofa using and contrasting cushions using Sheet Society’s fabric offcuts, and a striped floor lamp and wall art using my Sheet Society miniature wallpaper. I also made a modern fireplace using hobby wood, a window curtain, a pot plant using wooden balls and the coffee table I made for my last dollhouse. I could have squeezed in an armchair or two, but I didn’t want to suffocate the room, so I decided to leave it as is. Oh! And how could I forget all the teeny tiny things that make a dollhouse come alive - little pot plants, candlesticks, a newspaper and logs of wood.


The Kids’ Bedroom
In the Kids’ Bedroom, we’ve got Sheet Society patterned wallpaper I made at my local printer and popsicle stick floorboards, which I didn’t stain or paint. I also made the super cosy Sheet Society bedding with contrasting pillows using their fabric offcuts, the side table and lamp, pin board, window curtain and a plant pot. I thrifted the crochet coaster to use as a rug and added other cute miniature elements, including a surfboard (I put the wooden flower on it), table and chair, miniature books and pot plant, wooden train set and wall mirror. The wallpaper had lots of colours in a beautiful, vivid pattern, so I decided not to add lots of elements into this room, and I think it looks beautiful, fun and calming.


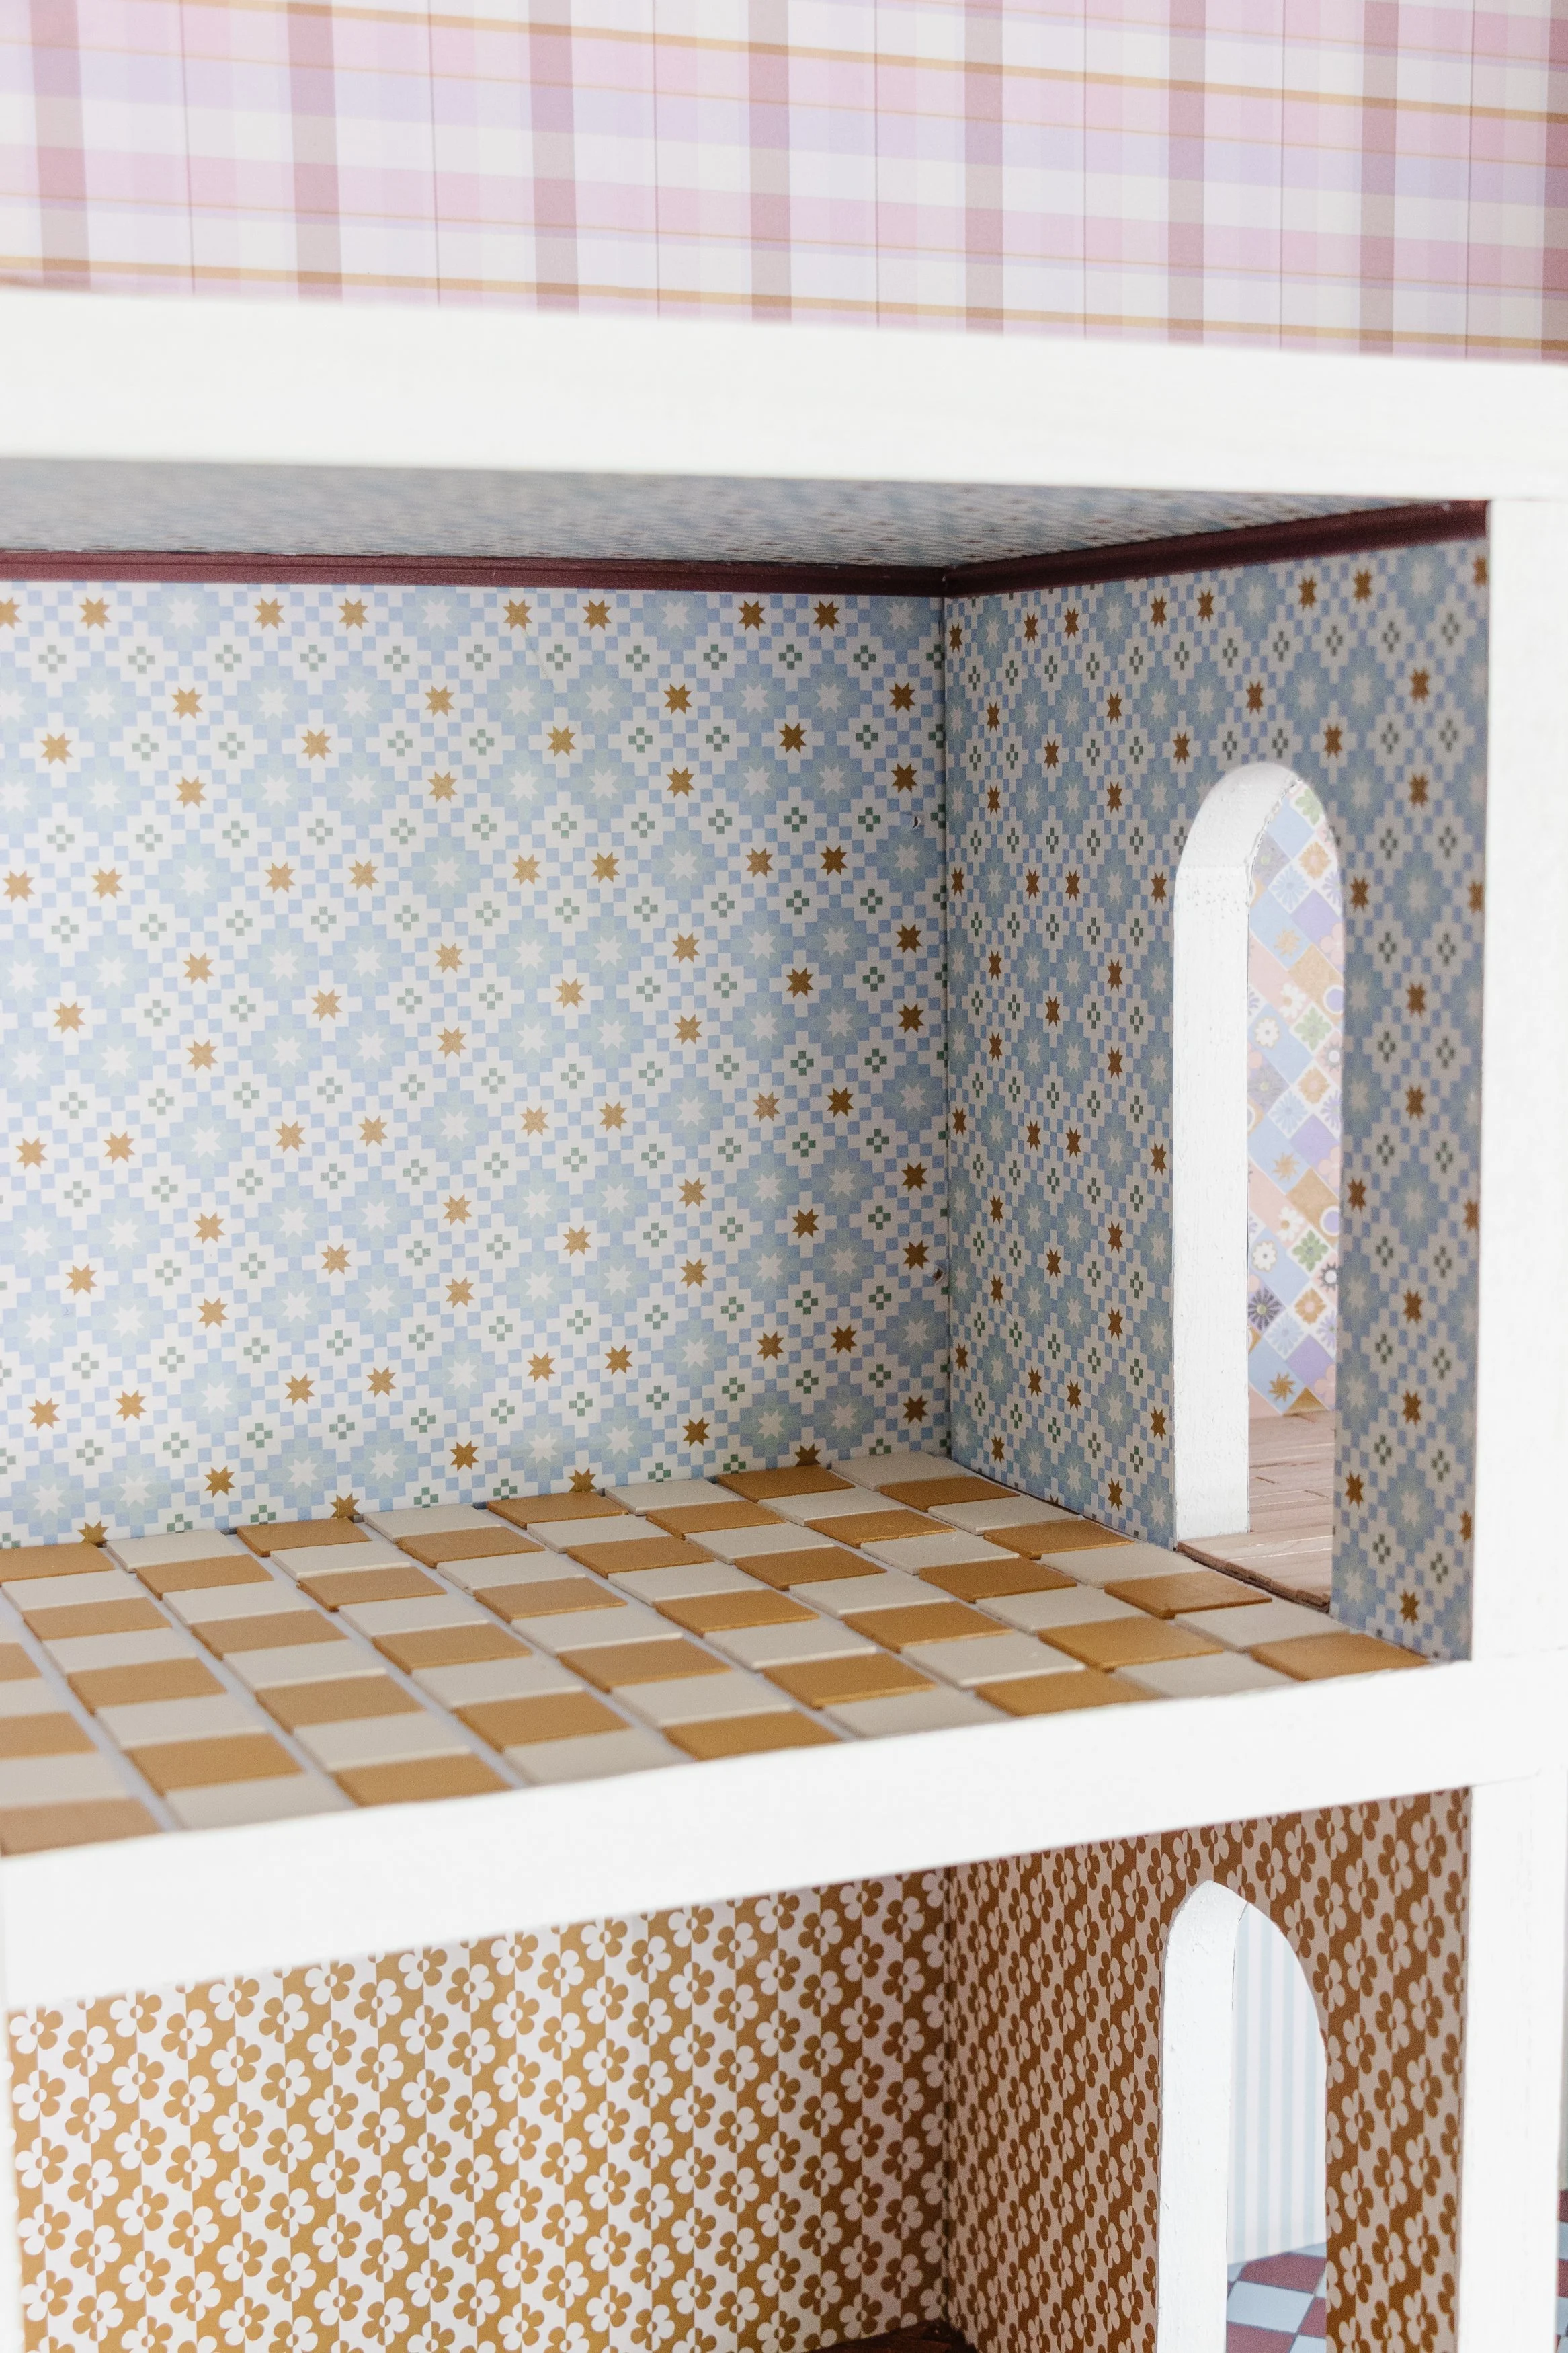
The Bathroom
In the Bathroom, we’ve got Sheet Society patterned wallpaper I made at my local printer, burgundy ceiling cornices and contrasting checker tiled floor - the colours were inspired by Sheet Society’s autumn colour palette. I used the bathroom set I previously put in my renovated dollhouse, but I removed the ugly brown toilet lid and sewed a pleated curtain, which I glued around the standing sink with hot glue - I am so in love with this cute addition! I thrifted a placemat, which I used to make the window blind, and I also made wall art, a towel rack with a towel, a towel shelf filled with tiny books, vase with flowers and more cute towels. Speaking of towels, which are all made using the fabric offcuts given to me by Sheet Society, I rolled some fabric and put them into a basket to make it look like rolled towels. I also used a tiny door knob for the ceiling light and you’ll notice there’s a little roll of toilet paper and a gold gilded mirror.


The Main Bedroom
In the Main Bedroom, we’ve got Sheet Society patterned wallpaper I made at my local printer, timber-stained popsicle stick floorboards and painted board and batten walls. The key pieces I made for the bedroom include the ball foot bed (I made it using a cardboard snack box!) with cosy Sheet Society bedding and lots of pillows (there are 5 in total), the plant pot, wall art with tiny bows, a ball foot coffee table, lots of mini books and vases filled with faux greenery and flowers, and two striped armchairs, which I made using kitchen sponges ha! Other pieces in the room include a basket, a wardrobe, sconces, another small door knob for the ceiling light and a bookshelf, which I painted.


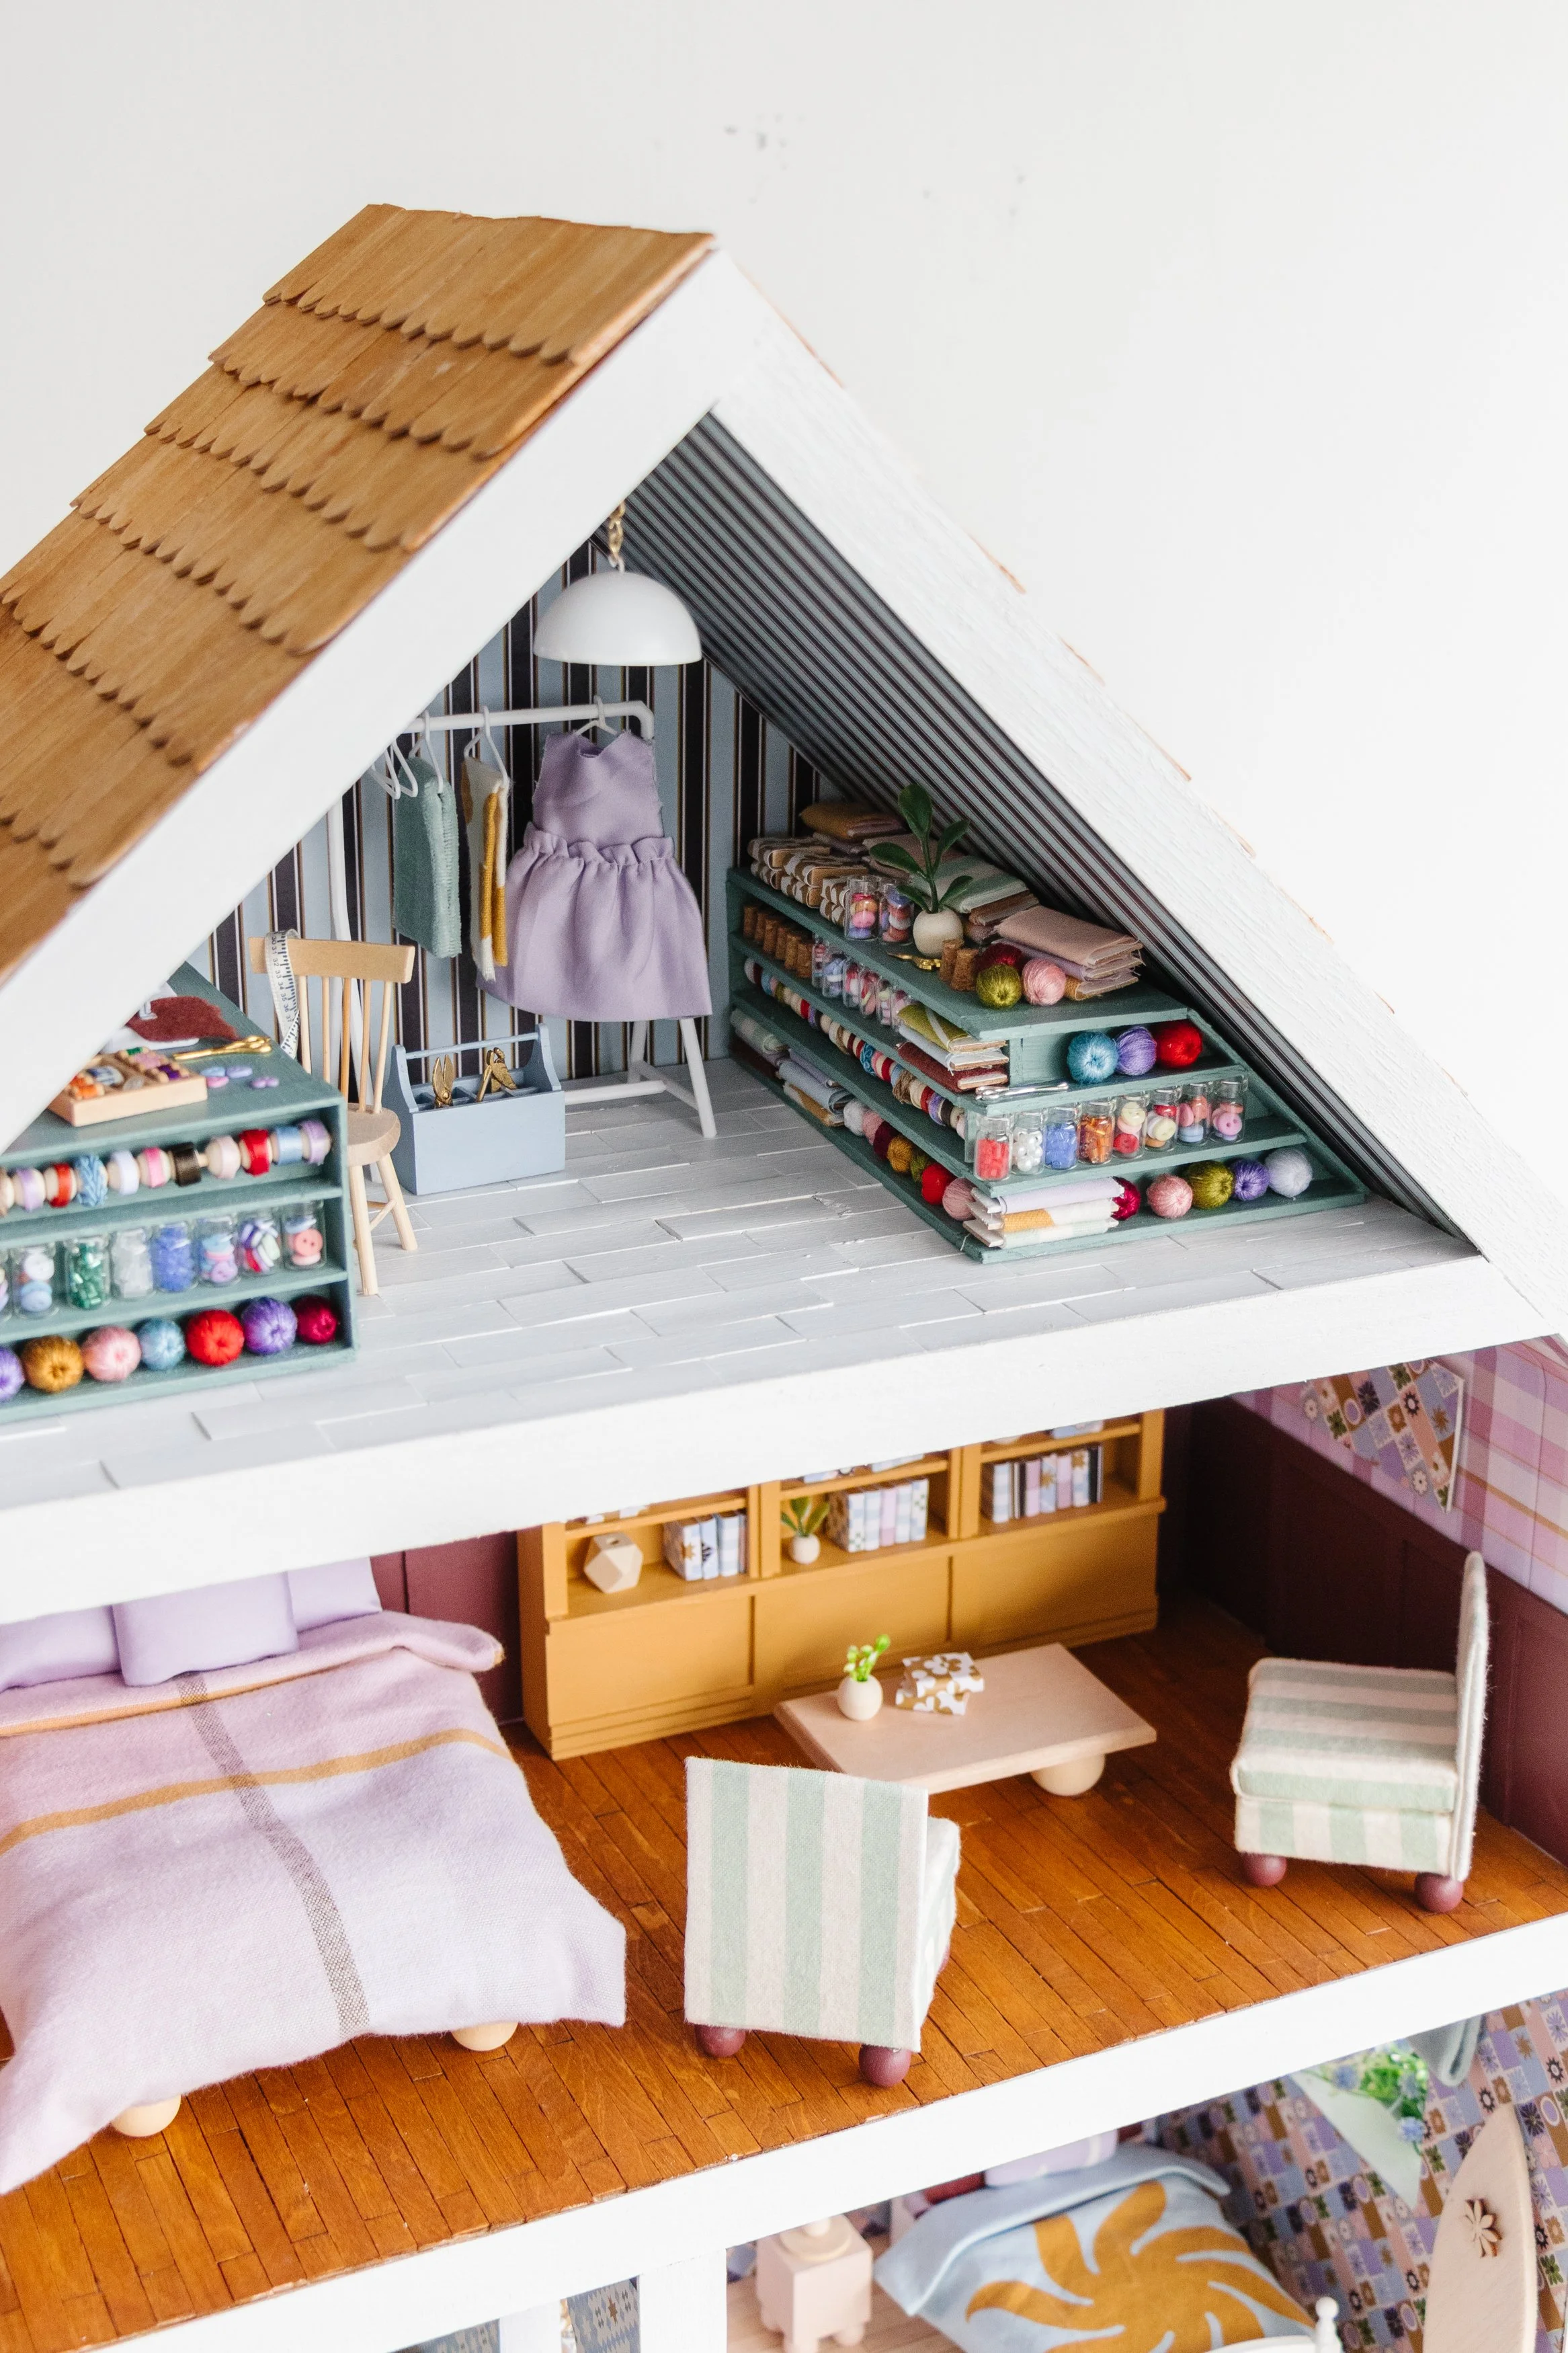
The Sewing Room
And finally, in the Sewing Room (my favourite room!) we’ve got Sheet Society patterned wallpaper I made at my local printer and painted popsicle stick floorboards. I made the two workbenches with lots of storage and space to sew and make things (if I could!). The tables are filled with tiny button jars and bead jars, little wool balls, bundles of Sheet Society fabric, colourful ribbon spools, pendant light (I made this using one of my kid’s round balls that a little toy came in and a gold chain), craft books, plant pots, a teeny tiny dress and fabric on hangers. There’s also a sewing machine (with some Sheet Society fabric!), teeny tiny scissors and buttons, a thread box, a clothes rack with hangers, a toolbox, a chair and a measuring tape.


It’s so wild to think I made this dollhouse from scratch and even though I can’t move in, at least I can pretend. Thank you for joining me over the last few days and I can’t wait to hear what you think!
This dollhouse series is in collaboration with Sheet Society


