
Upcycled Abstract Painted Room Divider
You won’t believe this transformation…
If you want to add colour to your home without the commitment of painting a wall or an entire room, this upcycling project is for you. I love finding pieces of secondhand furniture I haven’t had the pleasure of upcycling before. When I found this worse-for-wear room divider, I knew it had the potential to add all my favourite colours and experiment with the "unexpected red theory" by interior designer Taylor Migliazzo Simon where she says, "adding anything red, big or small, to a room where it doesn't match automatically makes the space look better." And I wholeheartedly agree.
To see how my Upcycled Striped Room Divider came together, watch this video
Before & After


Project Details
♻️ Upcycling: A secondhand room divider
🕒 Project Time Estimate: 3 hours minutes (not including paint drying time)
🪑 Skill Level: Beginner
💰 Materials Cost: $50
👷🏼♀️ Safety Gear: None
Materials
Drop sheet
Timber stain
3 x MDF panels
White primer paint
6 different paint colours
Tools
Utlity knife
Detail sander
120 grit sandpaper sheet
Wood glue
Microfibre cloth
Latex gloves
Paint roller
Pen & notebook
Pencil
6 Paint brushes
Optional: Leaf blower (lol)
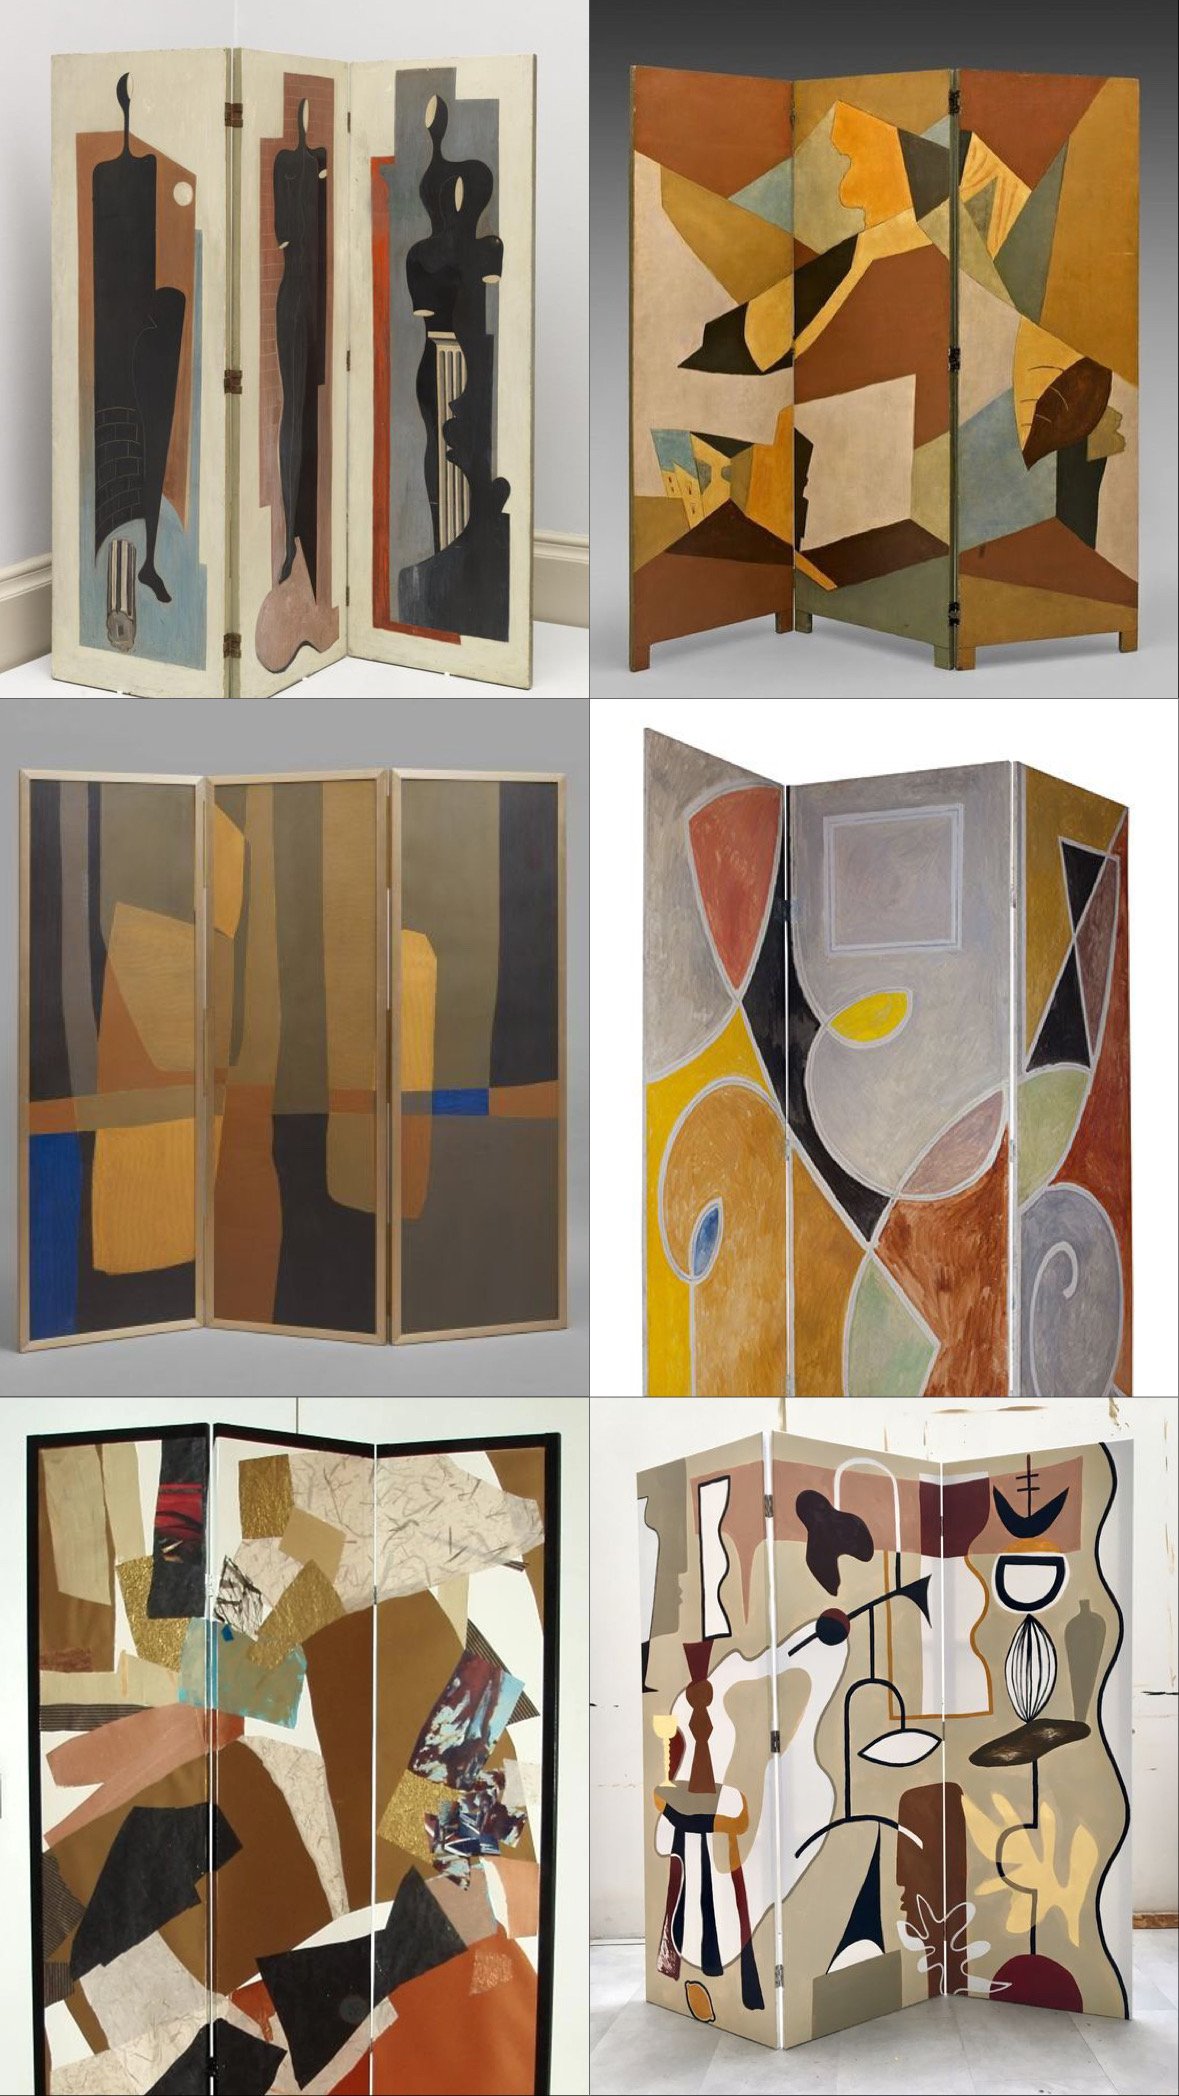
Inspo

How To
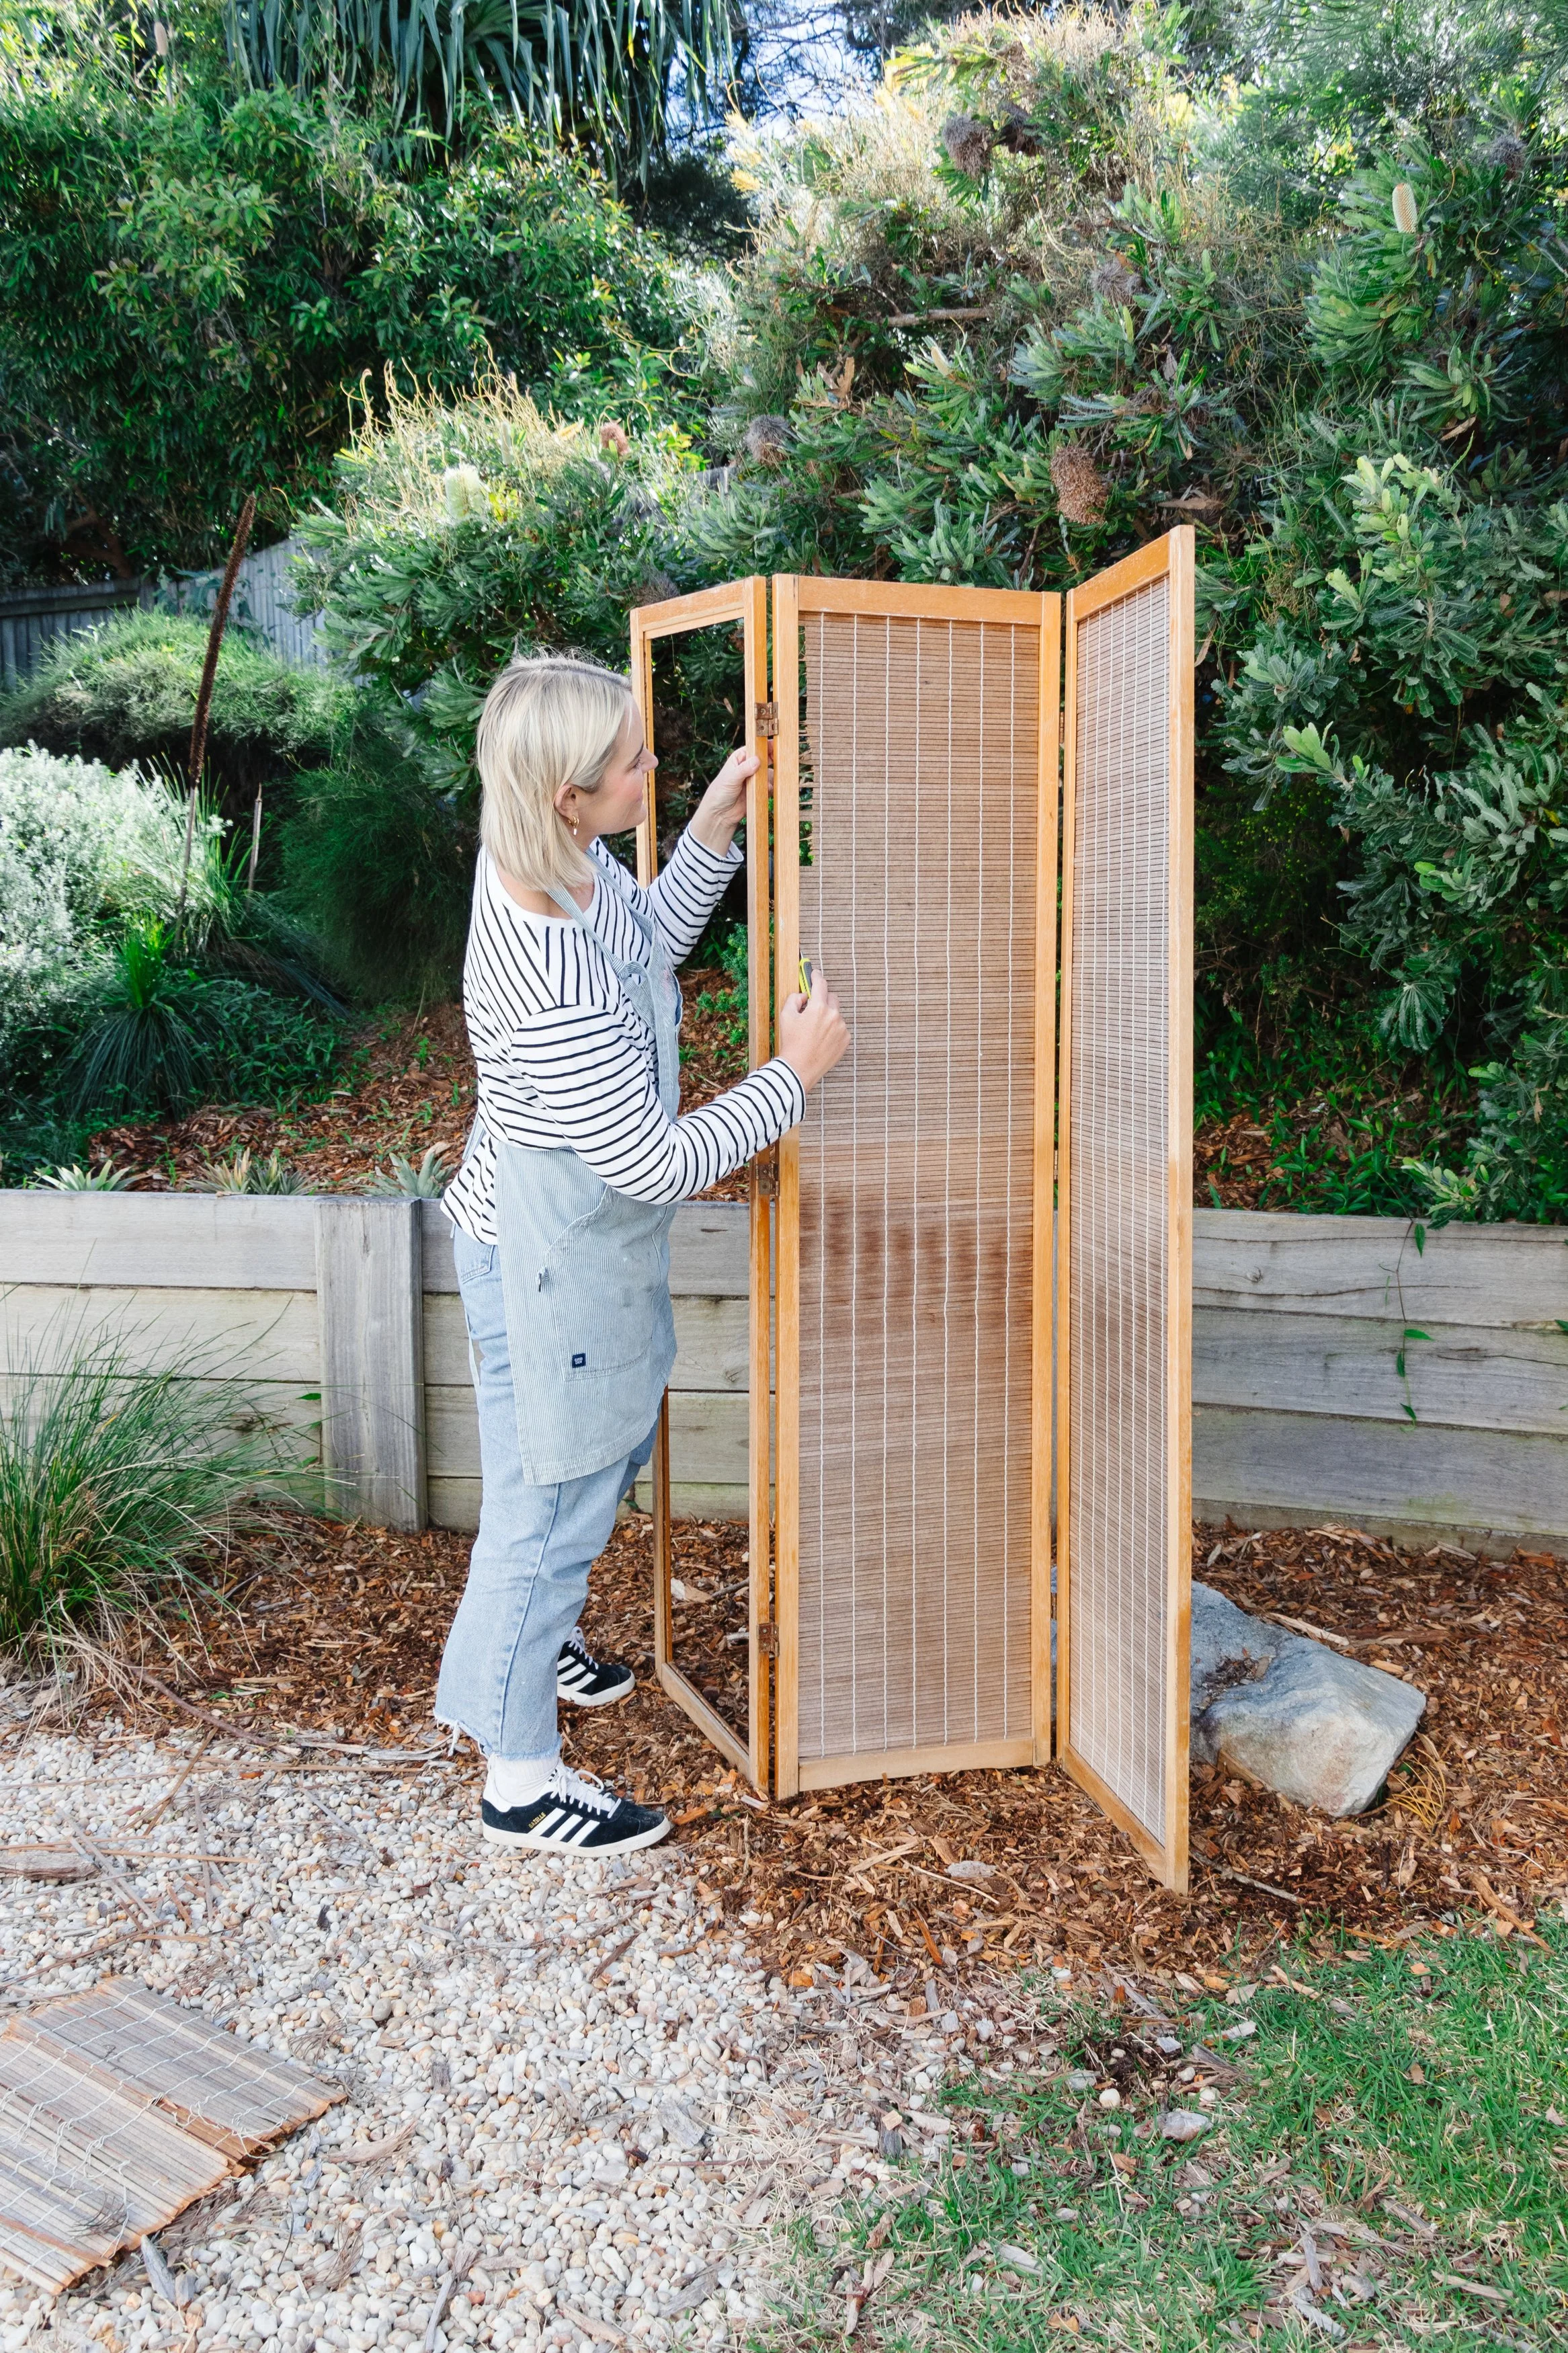
Step 1: Place a drop sheet on your workbench. Remove the bamboo from the timber frame using a utility knife. Sand the timber frame using a detail sander. Apply two coats of timber stain all over the timber using a microfibre cloth. Set aside to dry. Put the frame back together using wood glue and let it dry overnight.


Step 2: Using a roller, apply one coat of primer onto one side of the MDF panels. Set aside to dry. Using a pen, sketch out the design for the room divider in a notebook. Paint it, too, so you know which colours go where before you start painting the MDF. Using a pencil, outline your design onto the MDF. Paint the sections on the MDF panels using paint brushes. Set aside to dry or use a leaf blower like I did (lol).
Step 3: Pop the panels into the timber frame and that’s it!


Ta daaa!
After drying the painted MDF panels with my leaf blower, because why not, I popped them into the frame and that's it! I loved using my favourite colours for this upcycling project, I'm obsessed with "unexpected red theory" and I'm excited to know what you think, so let me know in the comments.


