Strawberry and Cream Naked Tiered Cake
Time spent in the kitchen is where I am truly my happiest; whether I'm cooking at home or in the beautiful outdoors. And this is the perfect cake to make for a birthday or a special occasion. In my case, it was my Dad's 75th birthday! I asked him what his request was (even though I already knew the answer) and he said vanilla sponge with fresh cream and strawberries. The art of the sponge is something I take quite seriously, so for this cake I decided to use a sponge recipe from one of my favourite bakers, Jocelyn from Grandbaby Cakes with a couple of tweaks and tips, and put my own spin on the cake from there.
Truly, there is nothing better than whipped fresh cream, strawberries and a light, fluffy vanilla sponge IMHO. And, this recipe is perfect if you don't want to bake a cake that's packed with sugar. I can promise it won't give you a sugar high, but this recipe does come with a warning - you won't be able to stop at one slice! It's just so fresh, and delicious, and a bit luxe.
What I love about this recipe it that you don't have to be a cake master. Phew! Baking and icing cakes is so intimidating, but over time I've learned a few techniques and tricks from watching Great British Bake Off and Great Australian Bake Off over the years. Full disclosure, I am that girl who watches baking tutorials on YouTube and wears an apron. After a lot of trial and error (too many errors to count actually), I have found over time that the trick with baking is to get all of your ingredients measured out before you start, and having the right baking equipment. It seems simple but when you are a novice, you just don't think that far in advance. Having your ingredients measured out will take aways some of that confusion as you work your way down the recipe. Also, having a few important pieces of equipment in your baking arsenal will make life a lot easier for you, so make sure you read my notes below before before you start making this cake. You may need to pick up a couple of supplies about a week or so in advance.
What I love most about this cake is that you can bake the vanilla sponge the day before and store them overnight in the freezer. In fact, the sponges can actually be stored in the freezer for up to 3 months, so you can bake them well and truly in advanced if you're that organised. I also like to assemble my cakes, where possible, when the sponge is frozen. It makes it so much easier to ice and decorate! I can't wait to share this recipe with you, so let's get stuck in.


Ingredients
For the vanilla cake - from Grandbaby Cakes
2/3 cup vegetable oil
1/3 cup unsalted butter room temperature (we actually used salted butter as it adds a little kick, so feel free to use either)
1 1/2 cup white sugar
3 large eggs
2 3/4 cup all purpose flour sifted
1 1/2 tsp baking powder
1 tsp salt
1/2 tsp baking soda
1 1/4 cup sour cream room temperature
1/3 cup full cream milk
1 tbsp vanilla extract
For decorating
600ml pure pouring cream
1 large tub of fresh, firm strawberries
Edible flowers (certain IGA's stock them)
Equipment
Stand mixer with bowl
Cake stand
Silicone spatula
3 x 8 inch springform cake tin (one is totally fine but you will need to bake each cake, and that will take 90 mins)
Skewer
Method
Start by preheating your oven to 180°C then liberally spray 3 (8-inch) round cake pans with non-stick baking spray or grease using a knob of butter
In your mixer bowl, add oil and butter and beat for 2 minutes on high speed.
Slowly add in sugar and beat on high speed for an additional 4-5 minutes until very pale yellow and fluffy. Occasionally use your silicone spatula to help the ingredients combine.
Next, add eggs, one at a time, combining well after each addition and scraping down the sides as needed. Occasionally use your silicone spatula to help the ingredients combine.
Turn your mixer down to its lowest speed, and slowly add flour into batter in two increments then add baking powder, salt and baking soda. Occasionally use your silicone spatula to help the ingredients combine. Be careful not to over beat.
Lastly, add sour cream, milk, and vanilla extract, scrape down sides and mix until just combined and turn off mixer.
Not everyone will have three cake tins, so one is completely fine. To ensure the batter is evenly divided, weight your batter in three bowls, or use an ice cream scoop, or a measuring cup.
Evenly pour cake batter into prepared baking pan and place in oven to bake for 20 to 30 minutes or until a skewer inserted into the centre of the cake comes just barely clean - set a timer so you don't over bake! I didn't do this for the top tier as I got distracted (#parentlife) and as you'll be able to see by the photos, it's cooked a bit more than the bottom two cake layers. So interesting! Start checking the cakes around 20 minutes just to be sure since everyone's oven is different.
Remove cake from oven and rest in pans for 10-15 minutes before inverting each cake from pans onto cooling racks until cooled. It's so important to make sure your cake has cooled down before you transfer it to a cooling rack.
Wrap cake in cling wrap and place in the freezer. Repeat until you have 3 cakes.
You can prepare the whipped fresh cream the day before or the day you plan on assembling and serving your cake. Simply pour the cream into the mixing bowl of your stand mixer and beat on high until the cream becomes thickened, light and fluffy. Be careful not to over whip otherwise it won't be usable. Set aside in the fridge.
Cut your strawberries into thin slices. Set aside in the fridge.
Assembling
This is the fun part! Assembling on a cake stand is important because you won't have to transfer the cake once it's decorated. You can also use a cake board if you'd like, assemble on a cake turntable then transfer to a cake stand if you'd like. But I find assembling on a cake stand is a lot less complex and a cake stand is just as easy to spin around while icing like a cake turntable.
Take your cakes out of the freezer and place one straight onto a cake stand.
Measure 1 cup of whipped cream and plop it on top of your cake. Using your straight spatula spread out the cream and leave a well in the middle. Don't feel like you need to spread the cream all the way to the edges, we get to this step a bit later.
Place a layer of sliced strawberries into the well.
Get another layer of cake, measure 1 cup of whipped cream and plop it on top of the cake. Spread it out using your straight spatula, then cream side down, place this on top of your first cake. You should now have two cakes on your stand.
Repeat steps 3 to 5.
It's time for your crumb coat. This is where you fill in the sides of the cake with more cream, spread cream on the top of the cake ensuring to cover all the crumbs. This is where your straight spatula really comes into play. Spin your cake around using the cake stand while you do this. A crumb coat does not need to be perfect, in fact, it should look a little rough. Once done, put the cake into the fridge for 30 minutes to set the fresh cream.
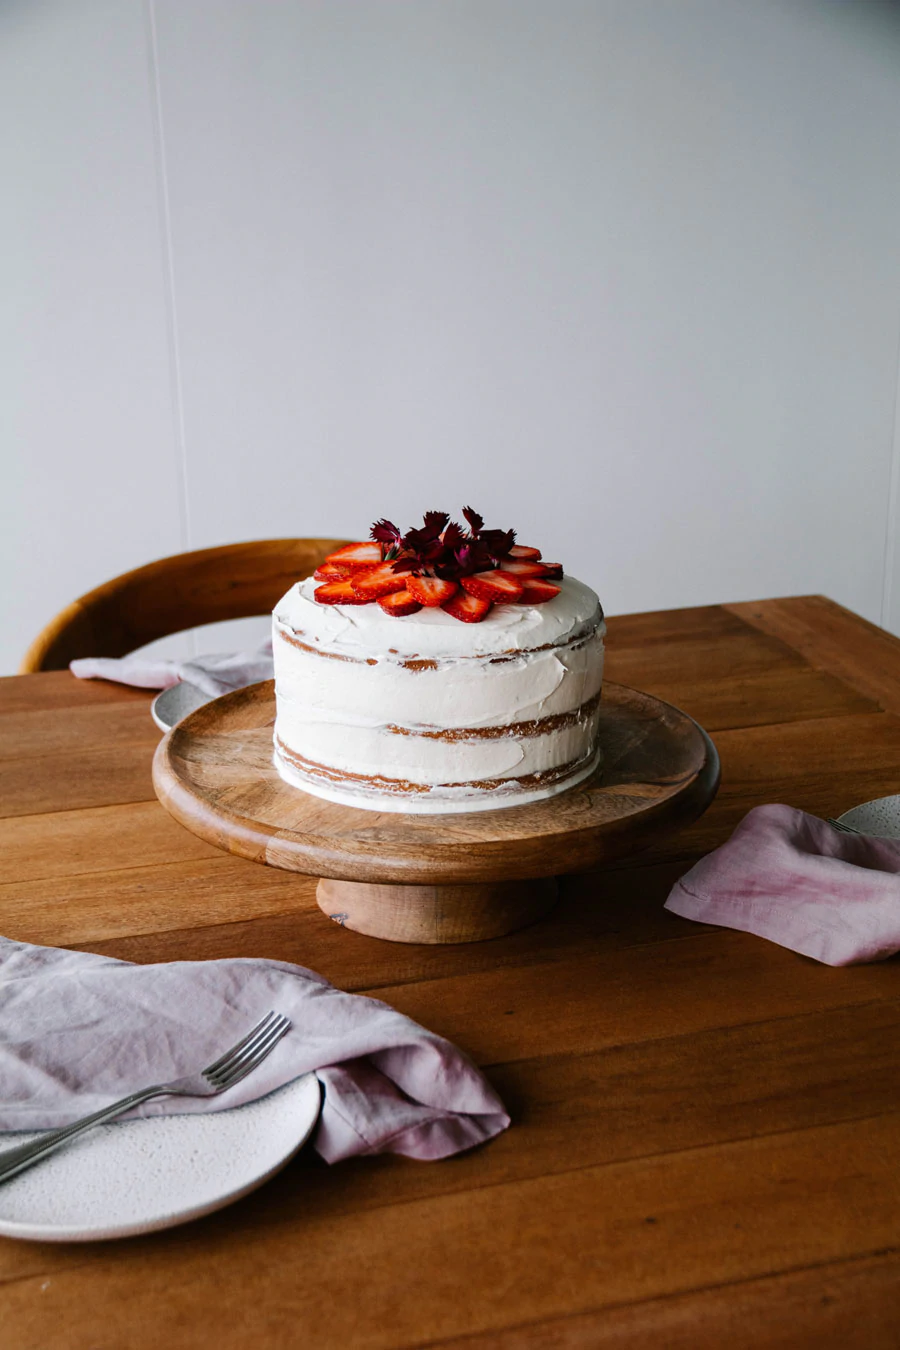
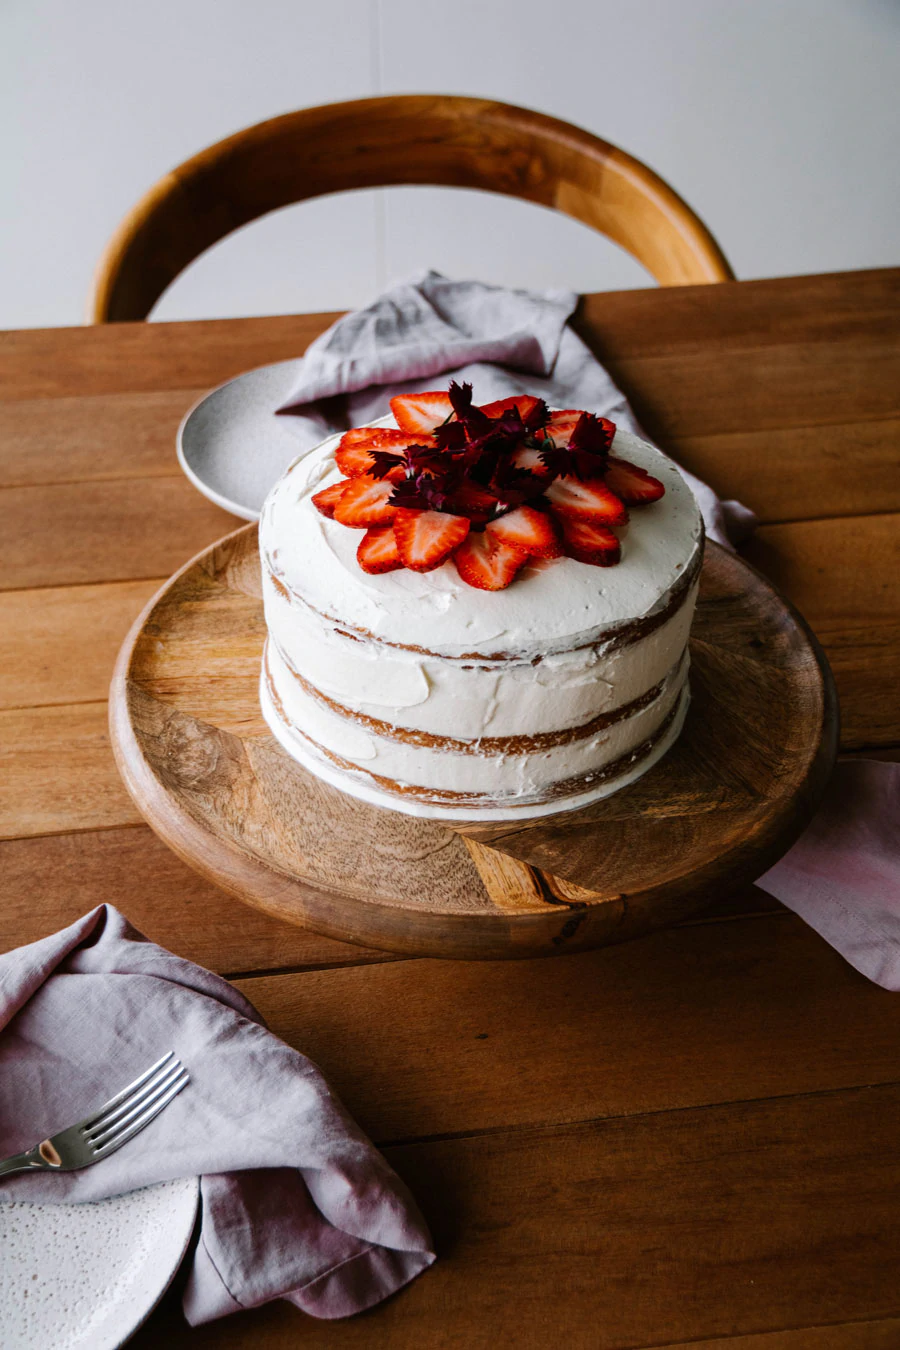
Take your cake out of the fridge and using the straight spatula, add more fresh cream and tidy up your cake. This is a naked icing cake, and that means you can see the layers of vanilla cake through the icing. I love this look!
Add sliced strawberries and edible flowers onto the top of your cake, and it's done!
Place in the fridge until serving. You could also take the cake out of the fridge an hour before serving to bring the fresh cream more to room temperature.
Enjoy!
Oh! I have one extra tip. Because this cake has fresh strawberries, it can spoil quickly. It should be stored in the refrigerator and after 1-2 days, freeze the remaining slices until you want to enjoy.